 A very important fifth birthday is on it’s way, so I’ve been hard at work making some invitations to go along with the super hero theme we’ve chosen. I gave myself a deadline of the end of school term to get DLT3’s birthday invitations ready. Otherwise I’d be handing them out only a few days before his party at the start of term 2!
I’ve finished the digital version of the invitation. I just wish I had a decent printer. And some cardstock would be good! Oh well. Maybe I’ll just email out the digital version tomorrow, and hand out the printed copies next term. That way the parents get plenty of notice, and the kids still get the excitement of a party invitation in their hands. It’s win win!
I’m pretty happy with the result. It’s simple, but nice and bright, and will match the colours we’re using at the party.
I made it using picmonkey, my favourite way to fiddle with photos and make printables. I’m still learning, but there’s so much you can do with it.
Just in case you’d like to have a go at making your own, I’ll go through the steps. And before you know it you’ll be making printables like a pro!
Step 1. Create a Collage

Click on ‘Create a collage’ near the top of the screen. On the left side of the screen are four icons (Images, Layouts, Swatches and Background). Click on the Layout icon, and you’re given a choice of different collage styles, or you can create your own. You can flip or rotate the templates, delete or add boxes, and drag the edges of the boxes to change their size. Basically you can create any collage layout you like! If you click on the Background icon, you can increase or decrease the spacing between the boxes, round the corners if you like, and set a background colour.
Step 2. Add Images to the Collage
 Now you can start dragging things into those little boxes! You can upload photos, although you might want to edit them first. A pic of the birthday boy or girl would be a great addition to a party invitation. Or you can drag in swatches (coloured and patterned wallpapers) to act as a background to overlays and text that you’ll add later. You can even make your own swatches. I made some with plain colours by creating a square and changing its colour. You have to do this in the photo editing section of picmonkey.
Another option is to buy digital patterned paper. I’ve been looking at moo&puppy‘s etsy shop. I haven’t bought any yet, but she has some beautiful patterns in every shade of the rainbow, and at a really reasonable price. Don’t forget to save your creation, ready for the next step.

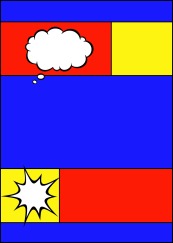
Now you have to go into the edit photo section. Get out of Collage by clicking the x in the top right corner, then click on ‘Edit a photo’. There are eight icons down the left side to choose from (Basic Edits, Effects, Touch Up, Text, Overlays, Frames, Textures and Themes). For this invitation I just used Text and Overlays. From the overlays I grabbed a speech bubble and an explosion-type shape, dragged them to where I wanted them, then resized them until I was happy. Then I went into Text, chose a font that I liked, and typed away. It’s then just a matter of moving and resizing again. I saved it with an empty speech bubble so I could print a customised copy for each guest.
So give it a go and see what you come up with! But if you’re stumped for ideas, take a look at picmonkey’s page on pinterest. In the Christmas folder they have lots of ideas for cards and tags that can be used as inspiration for invitations, tags, thank you notes and any other party printable you can think of! The sky is the limit really. 🙂

A penny for your thoughts!