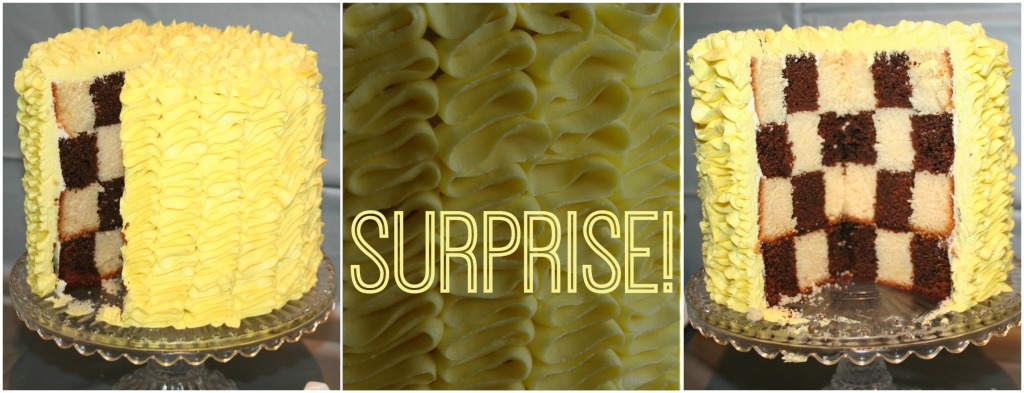
A while ago I had my first ever attempt at creating a checker board cake. Once you know the secret to it’s construction, it’s actually quite an easy cake to recreate. So hopefully I can remove the mystery with this photo tutorial, and maybe you can give it a go next time you want to make a cake that packs a big visual punch!
When I’m making a cake for a celebration, I like to give it a bit of height to make it look extra special. So beneath the icing of this cake are two layers of chocolate cake and two layers of vanilla butter cake. It’s only a little cake at about 6 inches diameter.
The trick to seeing squares when you cut into the cake is, believe it or not, using circles! I hunted around the kitchen for circles of the right diameter and ended up using a couple of round cookie cutters to create an outline of the circle. Then I cut along the line with a sharp knife held vertically.
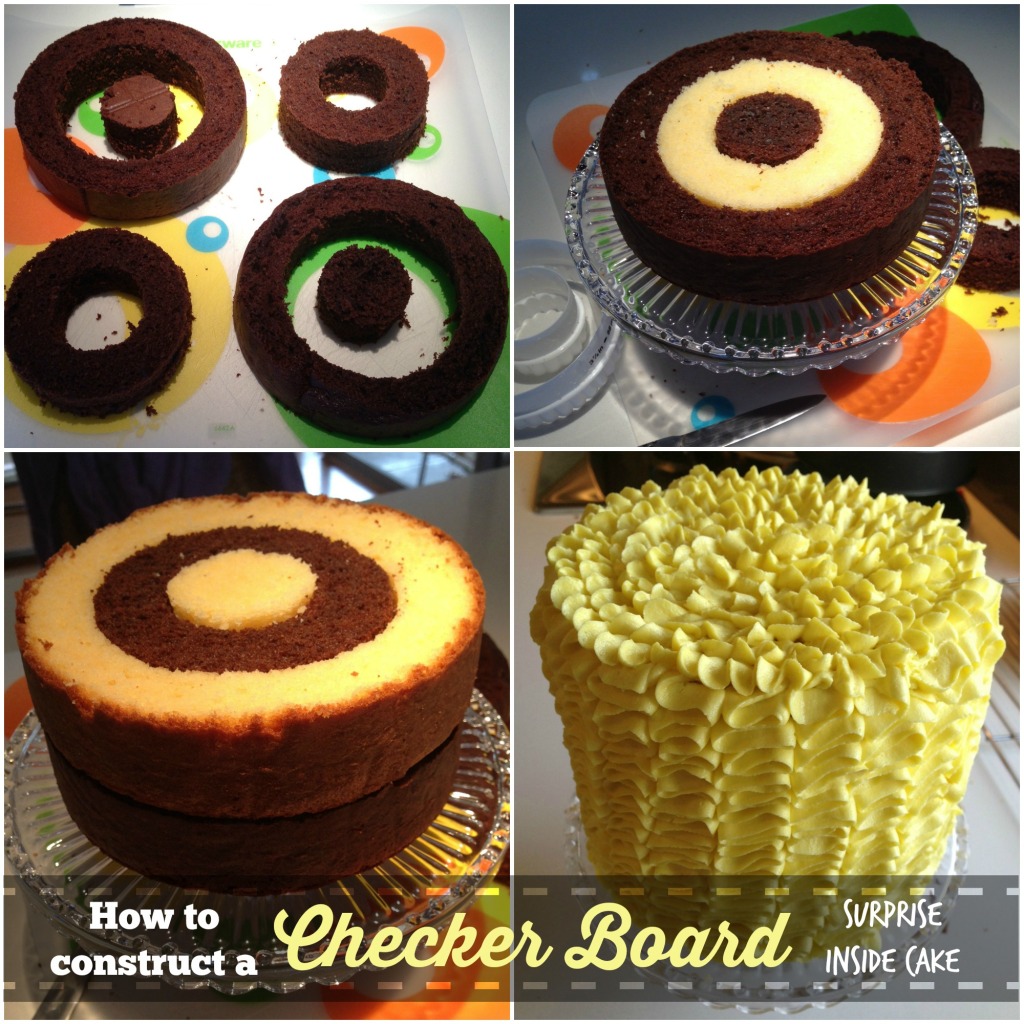 Very carefully lift the outer circle away from the two inner sections, then lift the next circle away from the middle section. You end up with two rings and a dot, which you can see in the top left photo. Repeat this process with the other layers of cake until you have a whole bunch of circles.
Now you can start to construct the cake. You can work from the outside in, or inside out, but I started with the largest ring of chocolate cake so I could easily centre it on the plate. Then grab a medium size ring of your other colour and place it inside, and finally place the dot in the middle. Make sure to alternate the colours, so it should look bit like a bullseye (top right photo)!
For the second layer of cake make sure the outer most layer is not the same colour as the one directly below it. I placed a large ring of vanilla cake on the stack, followed by a medium sized ring of chocolate cake, and a dot of vanilla cake (bottom left photo).
Repeat this process for your remaining layers, remembering to never put the same colour directly on top of itself! Once the cake is all constructed, give it a crumb coat, then ice however you like.

Now at this point I should confess to a problem I had with my cake. I didn’t put any icing between layers because I was worried about how it would look. It looked great, with nice crisp lines between the squares, but as soon as we tried to put the slice on a plate it all fell apart into little cubes! So lesson learned, put a thin layer of icing between each layer of cake to glue it all together!

A penny for your thoughts!